
Tuesday's Tip #27: Easy Email Merge with Word (Using an Excel List)
Did you Know Word has an EMAIL Merge Feature?
If you're like most people - you don't.
Most people probably know how to send an email to many recipients by putting their names in a BCC field so they don't all see the individual emails, HOWEVER, did you know, that like a mail merge, you can also do an EMAIL merge?
This means you can create an email in Word, customize these emails with individual fields (that could mean specific data like sales numbers or just a personal greeting) and send individual emails out in a single click. You can do this for up to 200 recipients. These emails send via Outlook and look just like individual emails you would have created and sent yourself.
Warning: You don't want to send hundreds or thousands of emails this way because you will get your domain blacklisted. If you need to send quantities larger than 200 - you will need to use a service like Constant Contact or MailChimp or something like that.
Check out the video above but here are the steps.
- Create an Excel file with all the information for the E-mail Merge. For example, name, email address and any other fields you want to use to personalize the emails. Then close the Excel file. It might look something like this.

- Create a new Word doc with the content of the email.
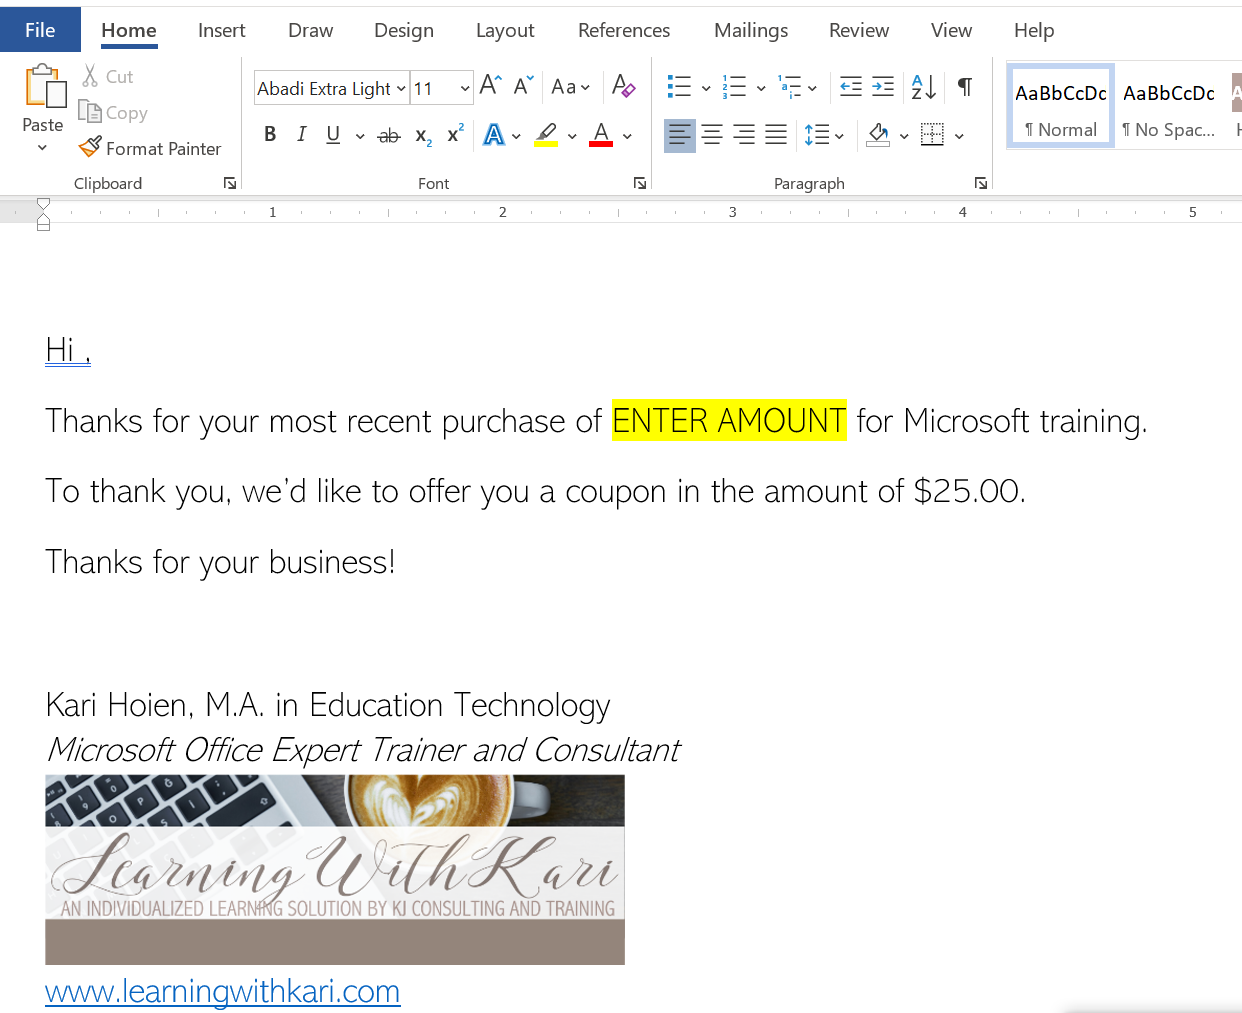
After you have added merge fields, it will look something like this.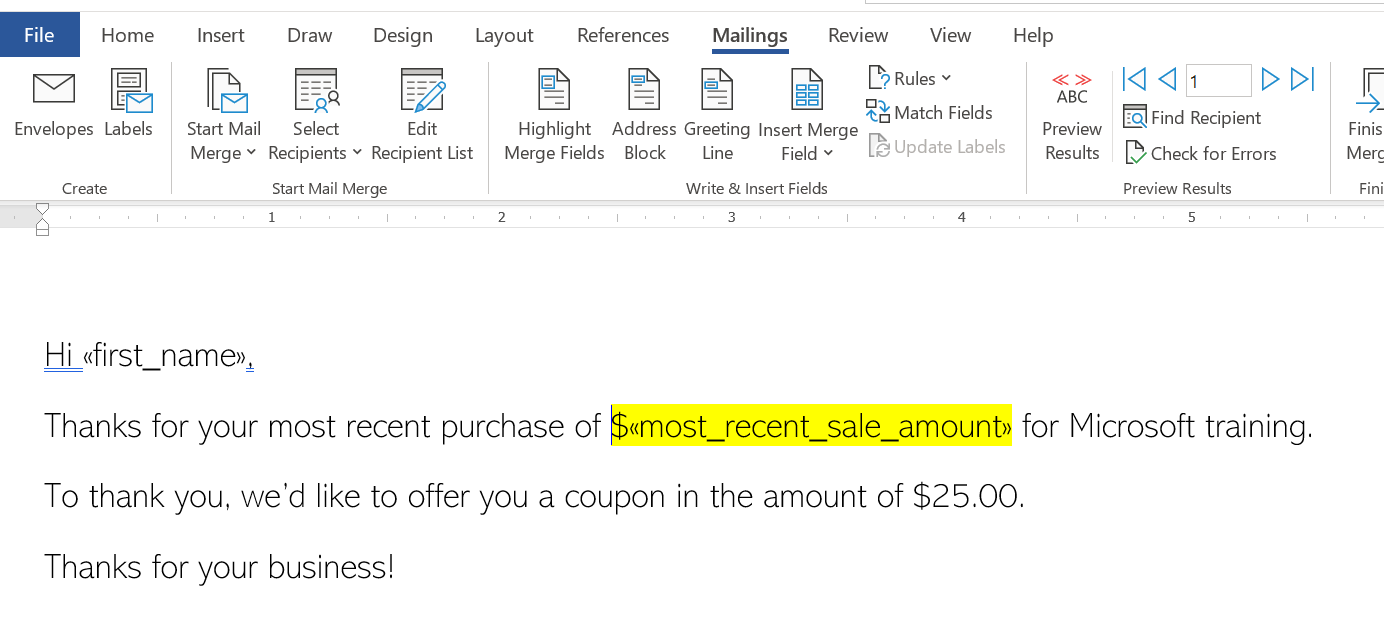
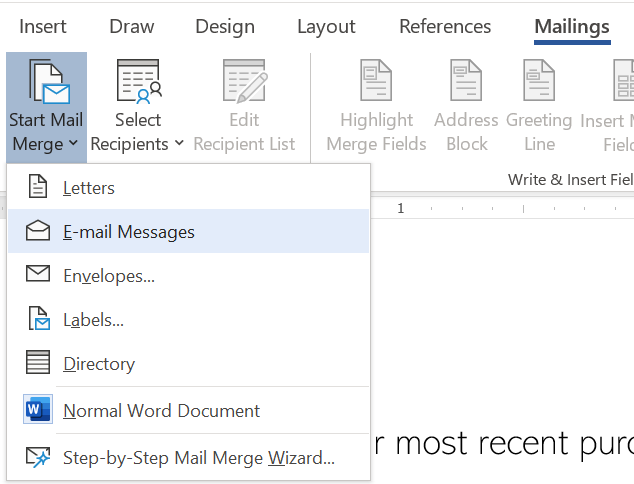
- Click on the Mailings tab and choose Start Mail Merge...E-mail Messages.
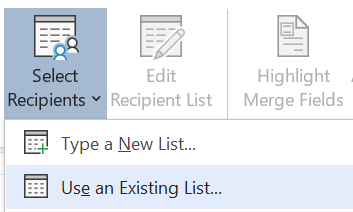
- On the Mailings tab choose Select Recipients...Use and Existing List.
- Browse to locate the Excel file and choose Open.

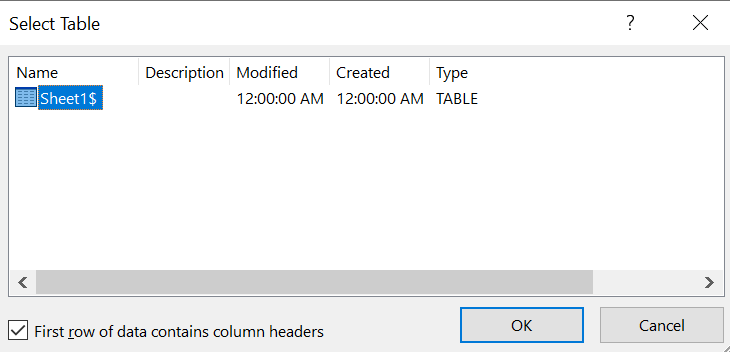
- Select the sheet that contains the name, email address and any other fields for the merge and click OK.
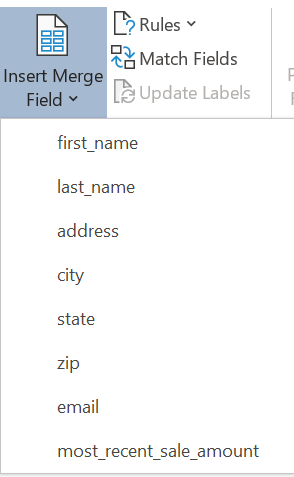
- Add the fields you want to the message by using the Mailings tab and Insert Merge Field button. Select the field you want to add to the message.
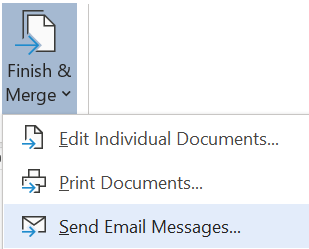
- When the message is finished, click Finish & Merge on the Mailings tab and choose Send Email Messages...
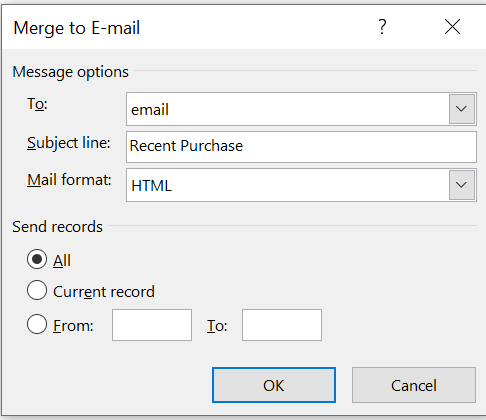
- In the dialog box, enter a subject line, verify the field that contains the email address is associated with the To: field and click OK.
Create Email merges for personalized customer follow up, mass emails to prospects, messages about new products etc. Remember you can export these emails from an internal software you use that already has names and email addresses in it.
